Loose hose. Inspect the connection to ensure it is not cross threaded, and then hand tighten the hose nut.
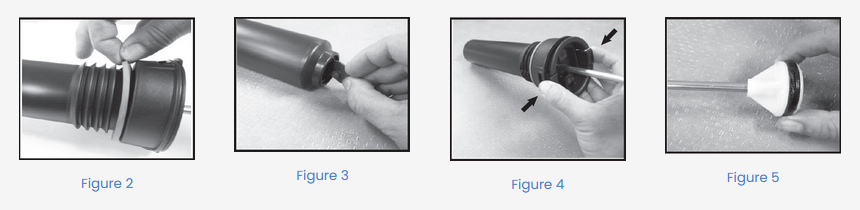
Inspect the pump gasket. Depressurize the sprayer and remove the pump from the tank. The pump gasket is located at the top of the pump right above the threads (See Figure 2). Remove the dirt or debris from the gasket and pump threads by wiping with a clean cloth. Then lubricate gasket with a light oil (i.e., 3-IN-ONE® Multi-Purpose Oil) to keep gasket from drying out. Replace pump in tank and hand tighten until it is snug. Do not overtighten as it can cause damage to the gasket. NOTE: If you notice the gasket is chipped, torn, swollen or misshaped, it will need to be replaced by ordering a pump service kit.*
Inspect the pump check valve. With the pump removed, locate the check valve at the bottom of the pump (See Figure 3). Make sure there is no dirt or debris underneath the check valve. It can be easily removed, washed and put back into place. If you notice it is damaged or worn, it will need to be replaced by ordering a pump service kit.*
Inspect pump piston o-ring. After you have removed the pump from the tank, you will need to separate the pump piston from the pump barrel. Squeeze the tabs on the cap and pull away from the barrel (See Figure 4). At the end of the metal piston/rod, there will be an o-ring (See Figure 5). Periodically this o-ring needs to be lubricated with a heavy coating of petroleum jelly to ensure a nice tight seal in the pump barrel – delivering as much air as possible per stroke. If you find this o-ring seal to be worn, damaged, or swollen, it will need to be replaced by ordering a pump service kit.*